Tuesday, June 15, 2010

Etsy Store is FINALLY Up!

Ladies and gentlemen, it is official.


the Painted Panda is on Etsy! You can check it out at thePaintedPanda.etsy.com!

As of right now, only four items are listed: two fabulous 4x6 frames, and the first half of my Minimalist Disney series. I'll be posting some more frames and monogram letters later in the week! Don't worry, I'll be posting here about those posts as well :)

Also, the Painted Panda is on Facebook! Doing big things, people, doing big things.

Saturday, June 5, 2010

A Great and Glorious Game, Part II

Sorry about the delay, folks. It's been madness trying to get my Etsy store up and running. More on that later... without further delay, I give you the completion of the story of the chess set.

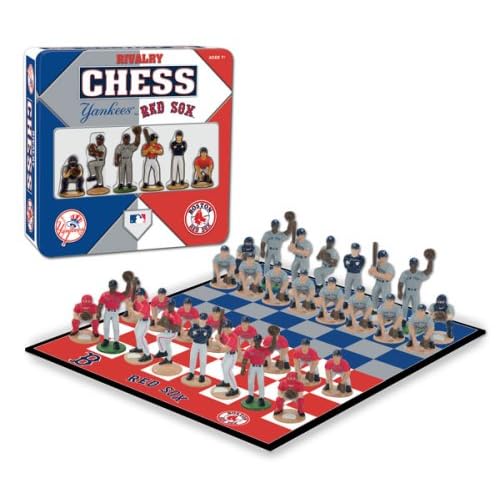
It was time to make a field for my baseball players. The board that came with the $3 Walmart chess set I was using for the pieces had a few problems. First, the board was the same off white/dark brown color scheme that the pieces came in, which was potentially fixable. Second, the squares were much too large for the chess pieces; they looked like they were from two totally different games. And finally, the board was made out of flimsy cardboard that refused to stay flat. Solution? Make my own board!

I bought some $1 craft foam from Michael's in red and navy blue, and another piece in green to make a little dugout for each team. Knowing that the flatness of the Walmart board was a problem, I also purchased a cheap picture frame so that I could press the foam under glass. I remembered that waaaaay back in elementary school, we had made checkerboard patterns by weaving paper together - it shouldn't be that much harder with craft foam. Right? WRONG.

After two hours of weaving, this was the result:
Pictured: Anger

Chess aficionados will notice that this board-in-progress is missing 2 rows and 2 columns. And it's already too big for the frame. And the more I tried to push the rows and columns in to the center, to make them tighter and reduce the size of the board, the more rows and columns from the outside I lost. It was horrible. The glue-y, foam-y mess that I had created was ruining my life. Worst of all, it was 3 in the morning: I couldn't go to Michael's and start over with new craft foam and smaller strips.

What to do? Luckily I had a few pieces of solid 12x12 scrapbook paper left over that were supposed to be returned home months ago and never quite made it. I'm pretty sure I squealed when I found a red piece and a navy blue piece. I started with narrower rows and columns, and they wove together so much easier than the foam. "Yes," I thought, "this is what kindergarteners do. This is why kindergarteners do not use craft foam."

Board done. Now to put it on the green craft foam so that it looked field-like. But UGH, red and blue checker on green foam? My poor eyes! Not something I wanted to look at. White border, yes please. I quickly cropped together an image I found of the Red Sox and Yankees names, in their respective fonts, and put them on the board to create dugouts. Put it in the frame, and the board is done!

Ta-daaaa!

But this project had a mind of its own, and it kept growing. Next I wanted to write Julia and Dave's full, newly degreed, names on to the box I would present it to them in, in their teams fonts. And koozies were on sale at Michael's, so clearly those were necessary too.

I began the quest for Yankees and Red Sox fonts. Now, if you Google "Red Sox Font", the first thing that comes up is a link to BoSox on Fontspace. Simple, easy, fabulous. I was psyched. The Yankees font? Less simple. After hours upon hours of searching, I was no closer to the script font the Yankees use. My sister suggested that I post on the WeddingBee message boards, since she has had luck there with font searching in the past. Tricksy sister. She reads the message boards religiously. I was too close; there was no way I was risking her finding out about this project now.

It was late. I had to leave for Atlanta fairly soon. I decided that juxtaposed with the Red Sox font, any simple script in navy blue would look like a Yankees font. Snell Roundhand it is. I slapped it on the card for Dave, and added some scraps left over from the paper I used for the checkerboard.

All tucked away in its box and ready for the trip

Julia's Koozie

Dave's Koozie

The most expensive part of this project was the plastic storage containers I used to keep the pieces safe on their journey to Atlanta. I used little art storage bins from Joann's, and stuffed each square with a folded tissue and a tiny square of wax paper to cushion and protect the piece. I had an extra logo for each team from printing out the dugout names, so I glued that on each box top. Unfortunately, the pictures of those came out kind of dark and awkward, so you'll just have to imagine them!

Finally finally finally, everything was packed up and ready to be revealed. I carried the giant cake box stuffed with the piece boxes, then the board, then the cards, and the top with their beautiful titled names. The koozies had to be carried separately. After Julia's research presentation, I kicked them out of their own dining room to set up the set. It's far more impressive set up than in box form!


And of course the best part: their reactions.


I'm not going to lie. I've never been prouder of a project. I just hope it holds up, and that they get a lot of love and use out of it. Congratulations again, guys!

Sunday, May 16, 2010

A Great and Glorious Game, Part I

As I mentioned earlier, I recently painted a graduation present for my sister and her fiance. It's basically my pride and joy. I put so much into it, and I really hope it shows!

The idea to make a Red Sox-Yankees chess set started last year when I visited my sister while she was in Boston for a clinical affiliation. Julia mentioned that she was looking for a chess set, but that she had only seen a Sox one once. A few months later, I looked it up and found this:


It appears to be the only Sox-Yankees chess set widely available, and it usually runs around $30-$50, depending on where you buy it. But with all due respect to the game's creator, it wasn't exactly my style (and it certainly wasn't Julia's). So I decided to make my own. It couldn't be that hard, right?

Wrong. Mostly, at least. I was quite limited budget-wise, but I had a bucket full of paint and a clear picture in my head. I had a few rules in mind:
1. The chess pieces had to look like traditional chess pieces.
2. I would only use retired numbers as the "characters". Babe Ruth would not be involved, and the pawns would not have numbers.
3. The cost of the whole project must not come anywhere close to the cost of the premade chess set.
4. Everything had to be completely TOP SECRET. All Julia and Dave could know is that I was painting them a joint graduation present. This part was tricky because practically everyone else in my life knew every detail.

Alright, it was time to start the planning. Picking the retired Red Sox numbers was easy, since I'm a Sox fan myself and knew the history pretty well. Even picking the queen was easy: Jean Yawkey, owner of the team for nearly 20 years and the only woman in the Red Sox hall of fame. Oh yea, the fact that the Red Sox have their own hall of fame also helped a little bit. Anyway, you should read about Jean; she's pretty cool.

Picking the Yankees players, on the other hand was more challenging. First, they have a billion retired numbers. Second, I don't know as much about Yankees history. I made a list of the big names and did a little research, but I definitely needed some guidance. Who could I ask? Well, the most dependable Yankees fan I know is Dave, and that clearly wasn't going to work. I turned to someone who hates the Yankees, but loves history, baseball and the history of baseball: my dad. He gave me some guidance (rearranged the players I had already picked), and talked out the queen issue with me. We determined that the only women we ever associated with the Yankees were Marilyn Monroe and Lola from Damn Yankees. Not knowing how Yankees fans felt about Marilyn, we opted for Lola. I also thought it would be a nice tribute to the fact that despite my feelings about the baseball team, I LOVE New York City, especially the theatre.

I found a chess/checkers/backgammon set at WalMart for $3, and decided I would use those pieces. I painted the off white ones white, then added the Boston logo to the front of each one. Then came the tricky part. I don't know what the heck I was on when I decided that I could fit "Yastrzemski" on the back of a chess piece. I quickly shortened his name to "Yaz" and made him the bishop, the narrowest piece. All photos mine:


The Red Sox logo on the front


The back of the Sox side

Learning from my experiences, I moved on to the Yankees side. I painted the dark brown pieces navy blue. Again, I started off with delusions of grandeur: I thought I could manage to put pinstripes on these tiny pieces! About halfway through the Sox side, I knew that was out of the question. Then it occurred to me: one of my biggest issues with the purchase-able Sox-Yankees game was that it didn't have a clear white side and a clear black side. With white pieces and navy pieces, I could continue my theme of a nontraditional traditional chess set.


The front of the Yankees side


And the jerseys. Finally!

The pieces were done. It was time to move on to the issue of the board. To be continued!

Saturday, May 8, 2010

I'm Alive! (a fake update)

Just an update to let everyone know that I am, in fact, alive. Just to clue you in as to why I've been so MIA lately, I graduated from the University of Florida last week, then moved from my sorority house into an apartment, and I am now in Atlanta for a week for my sister's graduation.

But I HAVE been crafting, I promise! In fact, my sister (of the fabulous Cooking for Gringas) and her fiance are BOTH graduating this week! Julia is getting her doctorate in physical therapy and Dave is graduating from law school. So of course I painted them a joint gift... and I'm pretty sure it's my best work. A long post about the whole process is coming soon, but here's a little preview:


Yep, she's a Red Sox fan and he's a Yankees fan. More updates soon!

Monday, April 26, 2010

Open Call for Suggestions

Got a great idea for a project? Anything you're absolutely dying to see me try out?

This post is an open call for suggestions and ideas! I'll always be checking it, so it's never too late to suggest something for this Panda to paint.

Please note that this is NOT the page for custom orders. If you'd like to order something specifically to be shipped to you, email me at thepaintedpanda (at) gmail (dot) com and we'll work something out.

So if there's something you'd like for me to try my paw at, leave a comment! I'm all about feedback, and I'd love to hear your thoughts!

Meet the Mascot!

First of all, I'm officially done with undergrad! I took my last final today, and I graduate in four days. Oh my goodness, I just can't wait for summer!

But more importantly... the Painted Panda officially has a painted panda! Ladies and gentlemen, may I introduce you to my new header, logo, and pretty much the basis of all things Painted Panda:


Pollyanna the Panda! She enjoys fresh bamboo, the color turquoise, and giving paw-painted gifts. Isn't she lovely?

After a few hours of painting, scanning, and Photoshopping, the Painted Panda finally has a whole new look. I'm even working on seals and labels for the first batch of crafts! Whatdaya think?

Wednesday, April 21, 2010

Welcome to The Painted Panda!

Before I actually start to post my goodies, why don't I tell ya'll a little background information about myself?

I consider myself a migrant by nature, and the next stop on my journey is the Big Apple. I'm really excited to move up north, but I've never really lived north of the Mason-Dixon line. My sister suggested that in order to get rid of my overwhelming amounts of acrylic paint/occupy my inevitably dull summers/try to earn a few more dollars before I move to New York, I start selling my hand-painted goods on Etsy.

"What a great idea!" I thought. But why stop there? If I'm going to be spending my entire summer painting and crafting, I might as well spend part of that time blogging. And blogging about crafting, of course.

So stay tuned for trinket boxes, wooden letters, and (my personal specialty) picture frames. Someone give this panda a paintbrush, because the summer is almost here!